Rosco WindowCling Filters
A practical guide to controlling windowlight on set or on location — fast. WindowCling attaches using static electricity, can be trimmed in place, and can be layered to fine-tune brightness as daylight conditions change.
What is WindowCling?
WindowCling is an ultra-thin window control film designed to quickly reduce and manage daylight coming through windows. It temporarily adheres to glass or plastic via static electricity — meaning no sprays, messy liquids, or adhesives.
Why crews use it
- Fast: position it, smooth it, trim it to size.
- Reusable: remove and re-roll for the next job.
- Adjustable: stack layers as the sun shifts.
- Cleaner workflow: no wet application methods required.
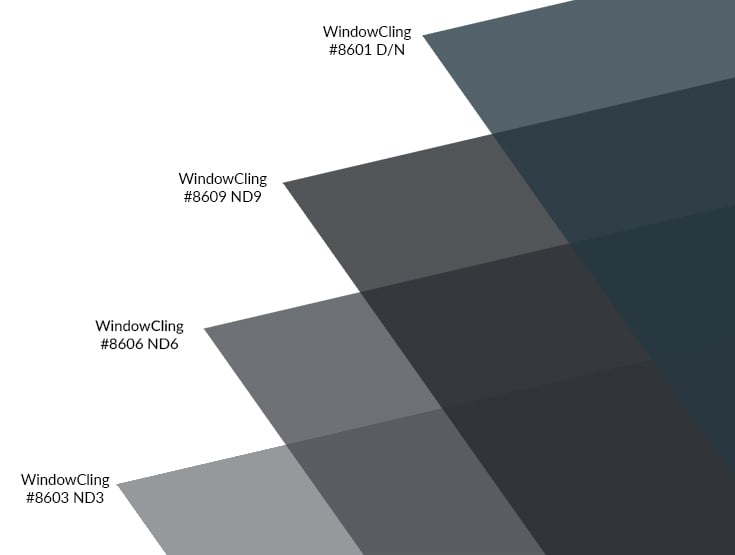
Product options
Choose the base density you need, then layer to dial in exposure. For day-for-night, start with the D/N layer and stack ND above it.
A light reduction option when you need to take the edge off bright windows while keeping the scene feeling natural.
View ND3 (#8603)A versatile mid-level reduction commonly used to control blown-out windows and bring exterior levels into range.
View ND6 (#8606)Strong light reduction for harsh daylight or when you need to see the view outside without crushing the interior.
View ND9 (#8609)Designed to create a “moonlit” day-for-night feel. Use it as the base, then stack ND above it to reach the desired level.
View D/N Layer (#8601)How to install WindowCling
The goal is a clean, dust-free pane and a smooth application. You can trim it directly on the glass for an accurate fit.
Simple install steps
- Clean and buff the glass so the film sits flat.
- Position the film on the pane and smooth it out from the centre.
- Trim to size using a sharp blade (matte knife / utility knife).
- For removal, peel gently and re-roll for reuse.
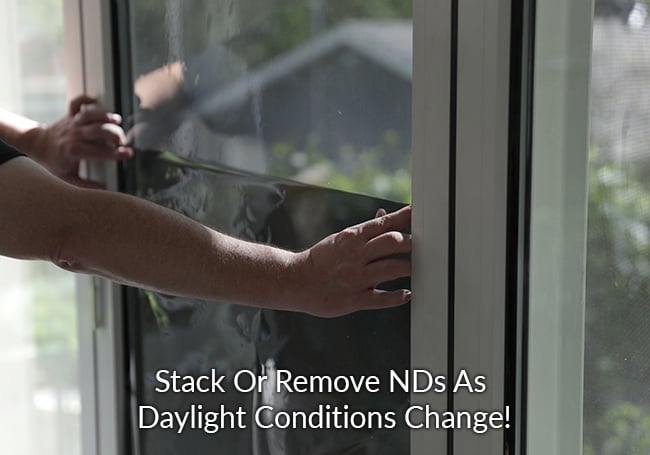
Stacking & exposure control
Daylight changes throughout the day. WindowCling is designed so you can layer densities to reach your target exposure without rebuilding the setup.
Quick choosing guide
- ND3: mild reduction, keep things natural.
- ND6: strong everyday control for many interiors.
- ND9: heavy reduction for harsh sun or bright exteriors.
- D/N Layer: create the “night outside” feel, then stack ND above it.
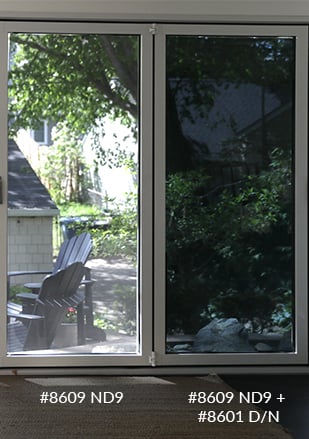
Day-for-night: what the D/N layer does
If you need to make it look like night outside while shooting during the day, the D/N layer is your starting point. Add ND above it until the exterior level sits where you need it.
Common day-for-night setup
- Apply the D/N layer first.
- Stack ND3 / ND6 / ND9 above it to reach the target level.
- Fine-tune by adding/removing a layer as the sun changes.
FAQs
Can I reuse WindowCling?
Yes — it’s designed to be removed and re-rolled for future use, since it uses static cling rather than adhesive.
How much can I stack?
The system is intended for layering so you can keep adjusting window levels as conditions change. (In practice, choose the closest base density, then add/remove layers to fine-tune.)
Do I need to pre-cut the film?
Not necessarily. Many crews position it first and trim it directly on the window for a clean, accurate fit.
When should I use the Day/Night layer?
Use it when you need a day-for-night look through windows. Apply it first, then stack ND above it until the exterior feels like “night”.
Need help choosing the right density?
Send a quick note with the type of shoot (interior daylight, day-for-night, view-outside requirement) and we’ll suggest the best starting point.