Rosco Fluorescent UV Paints: The Complete Blacklight Guide
A practical hub for scenic artists, educators and event builders using Rosco Fluorescent paints to create UV/blacklight effects, neon-style scenery, and high-impact scenic moments across theatre, film/TV, installations and themed environments.
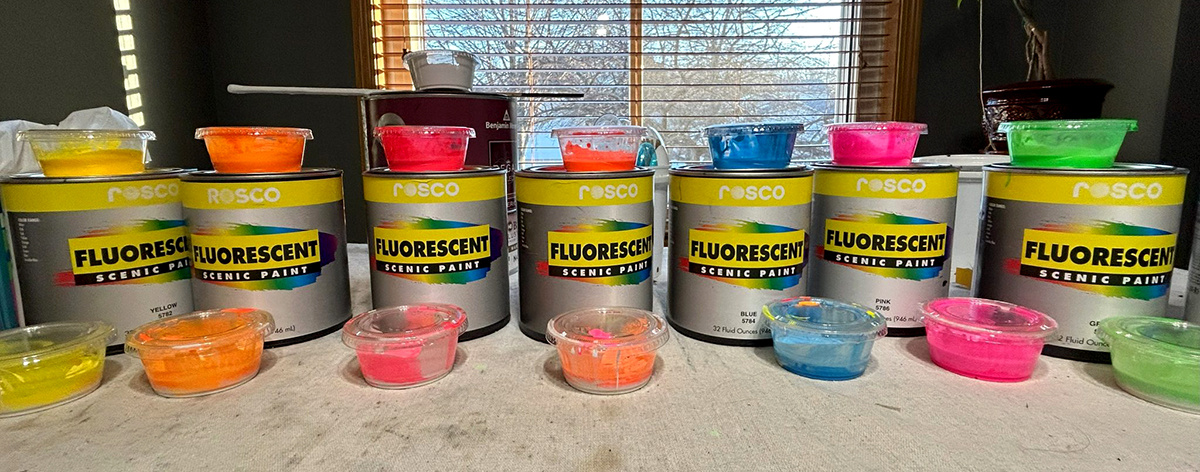
What are Rosco Fluorescent UV Paints?
Rosco Fluorescent paints are specialty scenic paints designed to appear intensely bright under normal light and to “glow” vividly under UV/blacklight. They’re available in a set of brighter-than-normal colours intended for blacklight effects, neon-style scenery, and high-contrast reveals.
Rosco states these paints use a high-quality, water-based vinyl acrylic binder (the same binder family as Off Broadway), and they can be used alone for UV effects or combined with other scenic paints to add extra “pop”.
Before You Paint UV Scenery: The 4 Things That Matter Most
Most “fluoro paint disappointments” come down to setup, not the paint. Based on Rosco’s testing-focused case study approach, these are the variables you want to control early:
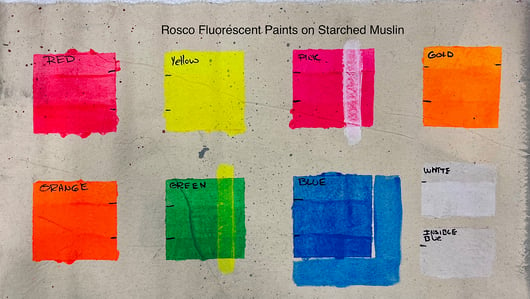
1) Your base coat affects everything
- White bases typically maximise vibrancy and help colours read cleanly.
- Dark bases can reduce visible brightness under white light, but can still glow under UV depending on thickness and pigment.
- Always test your full stack (base → fluorescent layers → optional topcoat) under both work light and UV light.
2) Layering beats “one thick coat”
- Fluorescents often need multiple coats for uniformity.
- Thin, even layers reduce patchiness and help you control how the paint reads in both lighting conditions.
3) Don’t thin if you want maximum glow
- Rosco’s UV paint FAQ notes Fluorescent paints are designed to be used straight from the can for maximum UV effect.
- Adding water will dilute the fluorescence under blacklight (useful if you’re intentionally trying to soften glow, but not for maximum punch).
4) Your UV lighting choice changes the result
- Blacklight intensity, beam angle, placement and distance all impact perceived glow.
- Test early with the exact fixtures (or the closest equivalent) you’ll be using in the final environment.
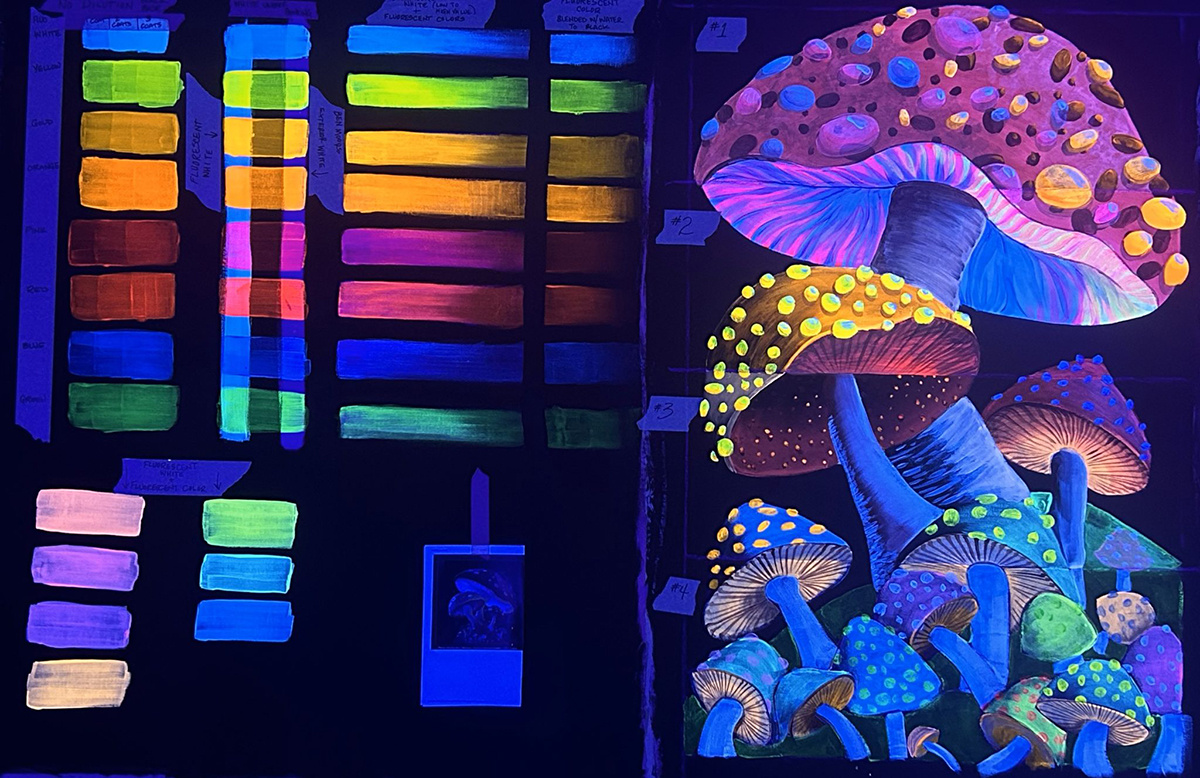
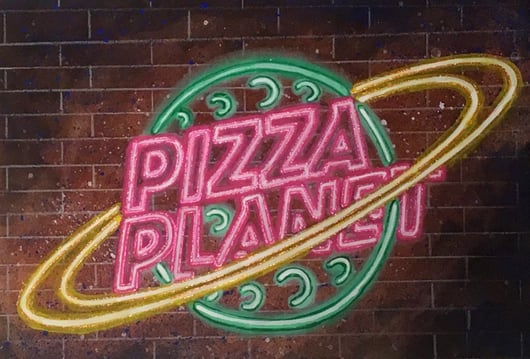
Neon Scenery: Why Fluorescent Paint Works So Well
One of the biggest “superpowers” of Rosco Fluorescent paint is how bright it can read while still allowing translucent, layered effects. In neon-style scenic workflows, you can build intensity by adding layers rather than making the paint opaque.
Practical neon workflow (fast version)
- Keep “tube” areas clean and controlled (masking/pounce/inking helps).
- Build colour in layers; avoid overworking partially dry paint.
- Test under UV while you paint — it’s the only way to judge the glow properly.
Durable + Water-Resistant Fluorescent Décor
Doing a Halloween event, outdoor install, or public-facing display? The key is treating the build like a scenic system: protect the substrate first, then paint.

What makes the difference outdoors
- Substrate protection: foam and carved props need a protective coating layer before paint.
- Paint system approach: use the right primer/coating for the material, then fluorescent colour layers.
- Topcoat decisions: if you need water resistance, choose a compatible topcoat and test (topcoats can change sheen and colour).
Note: always test your full coating stack under UV lighting before committing to large-scale production.


If you want an extra build-process image from the same case study, this link typically opens fine in a browser: FoamCoat on styrofoam props (GIF)
How Scenic Artists Use Fluorescent Paint (Practical Notes)
Application methods
- Brush: best for controlled tube edges, detail work, and painterly transitions.
- Roller: good for base fields and large areas; keep wet edge to avoid lap marks.
- Spray/HVLP: excellent for even colour fields and smooth glow layers (test dilution and build coats).
Where they shine
- Blacklight reveals and hidden scenic details
- Neon sign illusions and “tube glow” effects
- Immersive installations and themed environments
- Halloween events and public-facing displays
- Concert/theatre scenic moments where you need the audience to gasp
Fluorescent UV Paint FAQs
Do I need blacklight for fluorescent paint?
You’ll get bright colour under normal light, but the signature “glow” effect is created with UV/blacklight. Fixture type, distance and intensity affect the result—test early with your actual lighting setup.
Can I thin Rosco Fluorescent paint with water?
Yes, but Rosco notes these UV paints are designed to be used straight from the can for maximum UV effect. Adding water can reduce fluorescence under blacklight. Thin only if you’re intentionally reducing glow or changing handling.
Why does it look patchy under white light?
Patchiness usually comes from uneven base coats, overworking semi-dry paint, or inconsistent layer thickness. Use a uniform base, build thin even coats, and avoid reworking areas that have started to set.
How do I make fluorescent colours read “cleaner” and brighter?
A uniform white base coat generally helps with vibrancy and coverage. Then build fluorescent coats in layers. Always judge the result under both work light and UV light.
What’s the difference between Rosco Fluorescents and VividFx?
Rosco’s UV FAQ describes both as vinyl acrylic-based UV paint lines, with the primary difference being pigment load. VividFx has a higher pigment content. Fluorescents are a highly effective UV line and are commonly used for scenic blacklight effects.
Can I mix Fluorescent paint with other scenic paint lines?
Yes — Rosco notes the binders across their scenic paint lines are compatible with the UV lines. Fluorescent pigments can also be helpful when you want extra “pop” in bright colour matches.
Can I clear coat fluorescent paint?
You can, but topcoats can change sheen and deepen/shift colour. If UV performance is critical, test your complete stack (base → fluorescent → topcoat) under UV before committing.
Shop Rosco Fluorescent UV Paints
Looking for the right colour set for your project? Browse the range here: Rosco Fluorescent UV Paints
If you’re building a blacklight installation, we can help you choose colours, quantities, base coats, and the right lighting approach to get the best glow.
Planning a UV / Blacklight Build?
Get advice
Tell us what you’re building and what you’re trying to achieve. We’ll recommend the right paint approach and what to test first.